Have you ever walked into a thrift store and looked at something and think “Why would anyone purchase this?” LOL! I know I have…several times!!! Well, over on Pretty Girls Sew, we wanted to challenge you to think outside of the box and refashion a thrifted find.
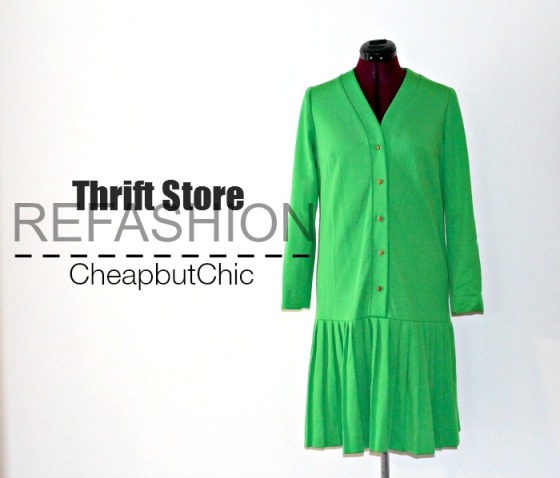 Here is what I picked up; A kelly green, drop-waisted dress with rusty, gold buttons. Doesn’t it just look so fabulous?! LOL! Not really. Taking something old and turning it into something beautiful definitely tests your creativity, your sewing skills, and problem solving skills. Imagination is key! So I had sooooo many things in mind for this but it all fell through because of the small amount of fabric that I was working with. This is where creativity and problem solving comes in. I literally had to take apart almost the entire dress. I kept a portion of the front button section as is, but everything else had to go.
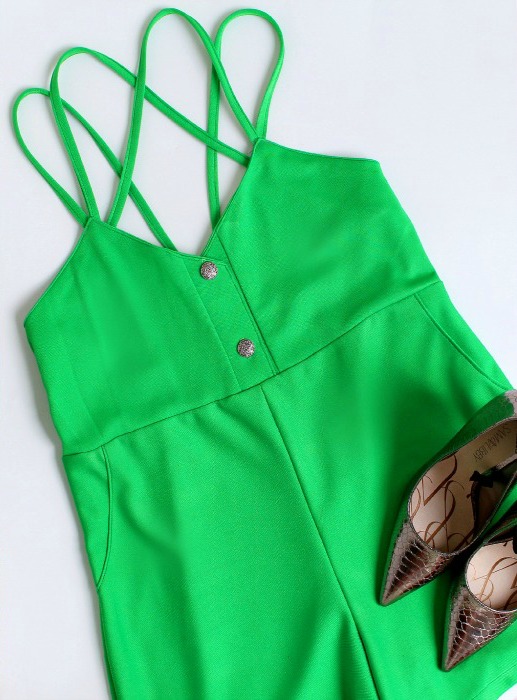
Here’s some notes on how I went about creating my finished piece.
1. I removed the sleeves, and bottom pleated skirt.
2. Using my bra as a guide, I created the top portion of the romper.
3. To create a nice and neat finish for the top, I cut out facings and neatly understitched it.
4. It took forever, but I ironed the pleats out of the skirt and turned it into shorts.
5. I really wanted pockets, but don’t have enough fabric so I made faux pockets. (LOL! Nope they aren’t real)
6. The waist was a tad large, but I didn’t want to take away any fabric because my hips are wide, so I added 2 darts in the back instead.
7. When hemming the shorts, I wanted the hem to be thick like most shorts are so that’s what I did.
8. I removed the old, gold buttons and added some nice rustic silver ones.
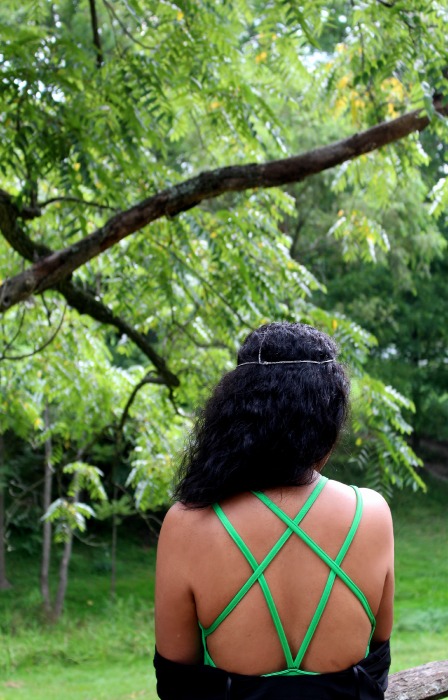
9. For the back, I created a drop back and added facing for a neat finish.
10. For the straps, I took the sleeves, and cut 1.5 inch strips. I stitched two together to make them long enough and stitched down the sides of each strap. I made a total of four straps. I criss-crossed it across the back side of the romper attached it the front and side.



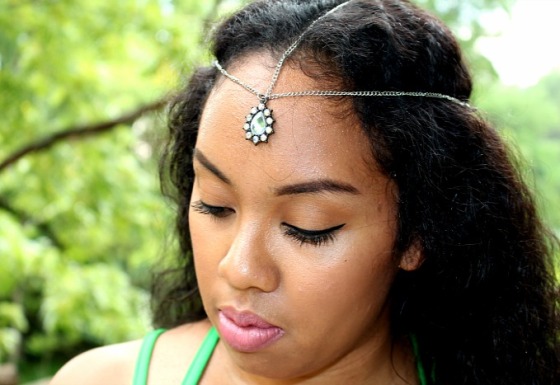 Head piece: DIY (tutorial coming soon)// Lipstick: Rimmel Kate Moss #17// Romper: DIY// Kimono: TJ Maxx// Heels: Charlotte Russe




You are awesome!! I did the sew along for July but I didnt post it because it didnt fit me but it fit my daughter somewhat!! SHe is in love with it…lol!! Thanks for those tips I will use those as a guide!! Again…AMAZING WORK!!!
LikeLike
Thank you Alicia. One more tip that may help is to try it on as you sew. I tried on this romper like 100 times. Every time I adjusted I had to make sure it fit how I wanted it to. So keep that in mind. You should still submit your pictures though. I’m sure you did a great job!
LikeLike
ok thanks thats probably where I went wrong lol!! I will submit later on, thanks!
LikeLiked by 1 person
You are very very creative…. not only do you have a great eye, but your sewing skills are perfect….. I’ve tried sewing and the finished product hangs ackward someplace…. I’m so impressed…. I may even dive back into sewing…. Thanks for ‘all’ the very cute ideas!
LikeLike
THANK YOU JEANIE! That was was sweet of you to say. I totally appreciate you stopping by. And Yes! Get back into sewing! You’re missing out on all of the fun. 😉
LikeLike
That is very creative. You did such a great and amazing job.
LikeLike
Thank you so much Kelly! 😉
LikeLike
Yes yes and yes! I always love how you style/refashion your thrift items!
LikeLike
LOL! Thank you! I know I need to do it more often. I bought another thrifted item for back up. Just in case this one didn’t work out. I may have to create something out of it. 🙂
LikeLike
Wow Tabitha, you did an outstanding job. Normally I do not comment- but you really made me take the time to say something. You amazed me with your revamp of that hiddeous dress. Again, awesome.
LikeLike
LOL! I love it! THANK YOU SO MUCH for commenting. I love to hear from those that stop by. You made my day! 😉
LikeLike
WA WA WHAT?! NO WAY!!!! This is just insane! I saw the dress in its original being and did NOT think it could be cute until I scrolled down! This seriously blew my socks off!
LikeLike
Lol! Awwww….Jennie! Thank you so so much! That means alot. You literally have no idea. XOXO.
LikeLike
Girl ! You are something else !!!!
LikeLike
Pingback: DIY Head Jewelry | Cheap but Chic
Love this!
LikeLike
Uhh GORGEOUS!!!
LikeLiked by 1 person
Thank you!
LikeLike
Reblogged this on @ruralafrican and commented:
WHEN THRIFTING TURNS OUT GOOD
LikeLike